


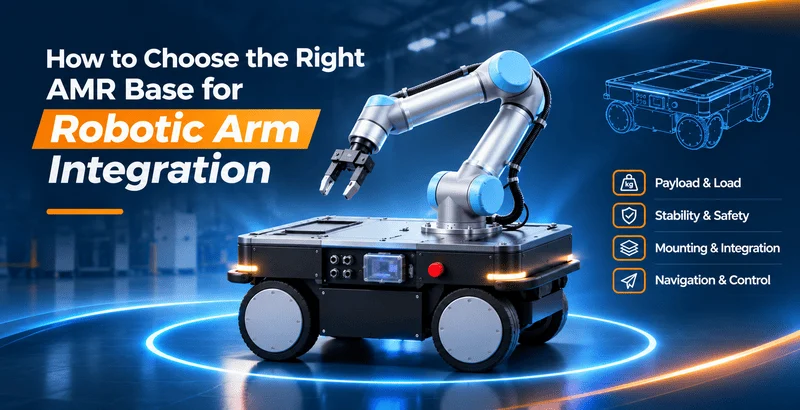
Mounting a robotic arm on an autonomous mobile robot (AMR) allows it to move between work areas and perform tasks such as material handling, picking, and machine loading and unloading. This type of system is known as a mobile manipulator. Choosing the right AMR chassis is essential for safe, stable, and reliable operation.
So how do you choose an AMR mobile robot chassis for robotic arm integration? Maximum payload is only one factor. You also need to consider the arm’s weight and reach, overall stability, mounting design, navigation performance, and system compatibility. This guide walks through seven practical steps to help you select a suitable platform.
Step 1: Define Your Robotic Arm Integration Requirements
Before comparing AMR chassis specifications, define the robotic arm and its intended application. Different arms have different weights, reaches, payloads, and mounting requirements. Even the same arm may place very different demands on a mobile base when used for light picking versus heavy workpiece handling.
1.1 Check the Key Robotic Arm Specifications
Start with the robotic arm manufacturer’s datasheet. Pay particular attention to the following specifications:
| Especificación | What It Means | Why It Matters for Chassis Selection |
|---|---|---|
| Arm weight | The weight of the robotic arm itself, usually excluding the end effector. | Forms a major part of the load the AMR chassis must carry. |
| Carga útil nominal | The maximum load allowed at the end of the arm. | Helps determine the allowable workpiece weight. It is not the weight of the arm itself. |
| Maximum reach | The farthest distance the arm can reach. | A longer reach can create larger shifts in the center of gravity and increase tipping risk. |
| Mounting method and base dimensions | The arm’s mounting footprint, bolt pattern, and fixing method. | Determines whether the top platform and mounting structure are compatible. |
| End effector and workpiece weight | The weight of grippers, suction tools, other tooling, and handled objects. | Must be included in total load and stability calculations. |
Important: A robotic arm with a rated payload of 5 kg does not necessarily weigh 5 kg. Check the arm weight, tool weight, and workpiece weight separately to avoid underestimating the load on the mobile base.
1.2 Define the Task and Operating Environment
The worksite is just as important as the robotic arm specifications. Ask the following questions:
- Application: Will the arm perform warehouse picking, machine tending, material handling, inspection, sampling, or automated testing?
- Operating environment: Will the robot work indoors, outdoors, or in both environments?
- Floor conditions: Are there slopes, thresholds, floor gaps, metal grates, or slippery areas?
- Available space: How wide are the aisles? How much turning space is available? Will people and robots share the same area?
- Duty cycle: How many hours will the system run each day? How many travel and picking cycles are required per hour?
These details influence chassis dimensions, drive system, wheel selection, navigation sensors, battery capacity, and safety measures. If the site has slopes or obstacles, provide photos and measurements rather than simply describing the floor as uneven.
1.3 Decide Whether the Arm Will Operate While the AMR Is Moving
One common workflow is to move with the arm retracted, then stop to work. The AMR travels to a workstation, comes to a safe stop, and lets the arm perform its task. Once the task is complete, the arm returns to its transport position before the AMR moves again.
If the arm must remain extended or continue working while the AMR is moving, the design becomes more demanding. You will need additional checks for dynamic stability, coordinated motion, collision risks, and safety control. For a first mobile manipulator project, the stop-and-work approach is often easier to integrate and validate.
Step 2: Calculate AMR Chassis Payload and Evaluate Stability
After defining the application, calculate how much weight the AMR chassis must carry. A common mistake is to count only the workpiece held by the arm. In reality, every component supported by the chassis must be included.
2.1 Calculate the Total Mounted Equipment Weight
A simple first estimate is:
Total mounted load = robotic arm + mounting bracket or plate + end effector + maximum workpiece + onboard controllers, sensors, computers, and other accessories.
For example, a mobile manipulator project may have the following configuration:
| Componente | Example Weight |
|---|---|
| Robotic arm | 18 kg |
| Mounting bracket and adapter plate | 8 kg |
| Gripper (end effector) | 3 kg |
| Maximum workpiece | 5 kg |
| Onboard computer and sensors | 4 kg |
| Total mounted load | 38 kg |
In this example, the chassis must support at least 38 kg of mounted equipment and payload. However, a chassis advertised with a 38 kg maximum payload is not automatically a suitable choice.
You must also check the load’s center of gravity, travel speed, floor conditions, slopes, and dynamic loads. Allow an appropriate engineering margin based on the actual application.
Payload definitions can also vary between manufacturers. The battery, motors, and body supplied as part of the chassis are generally included in its own weight. Any extra battery, cabinet, or module installed on top should be counted as mounted load. Ask the supplier to clarify the meaning of rated payload, maximum payload, and total vehicle weight.
2.2 Check the Center of Gravity and Load Distribution
Weight alone does not determine whether a mobile manipulator will remain stable. The position of that weight matters too.
If the arm is mounted high above the chassis, placed off-center, or extended far to one side, the system’s center of gravity can shift. This may increase the risk of tipping during arm movement, braking, turning, or travel over uneven ground.
Think of carrying a long pole with a weight at one end. The farther the weight extends from your body, the harder it is to keep your balance. A robotic arm creates a similar effect when it reaches outward.
Pay particular attention to the mounting position, arm working posture, and permissible center-of-gravity range.
Mount the arm within the chassis manufacturer’s approved load area. Avoid unnecessary mounting height or off-center placement. Evaluate full reach, side reach, and other demanding arm positions with the heaviest workpiece.
Ask the supplier for the allowable load center, center-of-gravity height, and offset limits under your planned speeds and floor conditions.
A high or off-center load can also reduce stability when the robot travels. For robotic arm integration, center of gravity and load distribution matter as much as the payload figure.
2.3 Evaluate Dynamic Stability During Movement
A system that is stable when stationary may behave differently when the arm accelerates, rotates, extends, or stops suddenly. The chassis also experiences changing forces when it starts, brakes, and turns.
The stability assessment should cover the most demanding operating conditions:
Include the arm holding its heaviest workpiece at an unfavorable reach, fast rotation or extension, sudden stops, and changes in motion direction. Also assess the fully loaded chassis during acceleration, braking, and turning, as well as travel over permitted slopes, floor joints, and uneven surfaces.
Do not use a simple payload percentage as a substitute for stability testing. Work with the supplier to assess the full configuration and verify it under controlled test conditions.
Step 3: Check Robotic Arm Mounting Compatibility
Once payload and stability look acceptable, make sure the arm can be mounted securely. Not every AMR chassis has a suitable top platform. Even if the bolt holes line up, the structure may still lack the strength, stiffness, or space required.
3.1 Check Platform Dimensions and Mounting Interfaces
Check these mechanical details before purchasing:
- The top platform’s length, width, usable mounting area, and height above the floor.
- The number, size, spacing, thread type, and allowed locations of mounting holes.
- Whether an adapter plate, reinforcement plate, or custom bracket is needed between the arm and chassis.
- Whether the arm can move through its operating range without hitting the vehicle body, wheels, sensors, or nearby equipment.
Before purchasing, request the chassis outline drawing, top mounting drawing, and available CAD or 3D files. Compare them with the robotic arm’s installation drawings. Product photos and overall dimensions alone are rarely enough.
3.2 Check Structural Strength, Stiffness, and Vibration
A robotic arm applies forces and moments to its mounting platform during operation. If the top plate, bracket, or fasteners are not stiff enough, the arm may shake, vibrate, or lose positioning accuracy. Long-term reliability may also suffer.
The chassis supplier needs the arm’s weight, reach, payload, and operating cycle to assess the mounting structure. If a custom bracket is required, review its material, plate thickness, fastening method, and maintenance access. The goal is not just to make the arm fit. The mounting assembly must withstand both static and dynamic loads.
3.3 Check Sensor Visibility, Cables, and Maintenance Access
After installation, the robotic arm may block LiDAR, cameras, ultrasonic sensors, or emergency-stop access. Moving joints may also pull, pinch, or twist cables and air hoses.
Check the full range of arm movement for blocked navigation or obstacle-detection sensors. Route power cables, communication lines, and air hoses with enough slack, secure fixing points, and suitable protection.
Keep the battery, controllers, protective devices, and emergency-stop buttons accessible. Check for pinch points, interference, collision risks, and possible contact with people.
Step 4: Match AMR Drive and Navigation to Your Worksite
An AMR carrying a robotic arm must do more than move. It needs to travel reliably through the worksite and stop in a position where the arm can perform its task. Drive layout, robot size, obstacle clearance, and positioning performance should match the actual site.
4.1 Match the Drive System to the Worksite
Different mobile robot chassis designs have different strengths. More wheels or a more complex drive system do not automatically mean better performance.
| Configuración de tracción | Typical Characteristics | What to Check |
|---|---|---|
| 2WD differential drive | Relatively simple design. Common on smooth indoor floors. Turns by varying left and right wheel speeds. | Aisle width, floor quality, turning space, and payload. |
| 4WD (four-wheel drive) | Drives multiple wheels and can provide greater traction in suitable configurations. | Surface grip, slopes, tires, and steering method. |
| 4WD-4WS (four-wheel drive, four-wheel steering) | Combines four driven wheels with four-wheel steering. Available steering modes depend on the specific design. | Maneuverability, turning path, control behavior, and mechanical complexity. |
| Omnidirectional chassis | Some designs allow sideways or diagonal travel for easier alignment with workstations. | Whether lateral movement is needed, plus floor quality, load, and positioning needs. |
For a robot following fixed aisles on a smooth warehouse floor, a simple differential-drive chassis may be enough. If the site needs greater steering flexibility or traction, consider a 4WD-4WS platform. Prioritize omnidirectional movement only when sideways positioning is useful. Make the final decision using full-load tests on the intended route.
4.2 Check Navigation Accuracy and Workstation Docking
Navigation helps the AMR reach the correct workstation. Docking performance determines how consistently it stops in the required position and orientation.
Chassis positioning accuracy is not the same as robotic arm tool accuracy. Docking errors, vehicle orientation, uneven floors, mounting deflection, arm accuracy, and changes in object position can all affect the end effector’s final location.
For larger objects with generous position tolerance, standard navigation and a suitable workstation layout may be enough. Precision loading, insertion, or small-part picking may require accurate docking, machine vision, locating fixtures, or an extra calibration step.
Ask the supplier how localization accuracy and repeat docking accuracy were measured. A single accuracy number without test conditions is not enough.
4.3 Check Slopes, Thresholds, and Clearance
Measure the narrowest aisles and doorways, turning areas, slope angles, thresholds, and floor joints. Use the full assembled robot dimensions, including the arm, mounting structure, and workpiece.
A bare chassis that can climb a slope may not be suitable for the same slope after a robotic arm is installed. A higher or offset center of gravity can change the allowable speed, slope, and braking conditions. Ask for an assessment of the integrated system, not just a demonstration of the unloaded chassis.
Step 5: Check Power, Software, and Safety Integration
A chassis and robotic arm may both work well on their own but still require substantial integration work. Check electrical compatibility, communication, coordinated control, and safe fault handling.
5.1 Match Battery Capacity and Robotic Arm Power Requirements
Review the arm’s and onboard equipment’s specifications for operating voltage, continuous power, peak power, startup current, and duty cycle. Compare these requirements with the AMR’s available power outputs and battery capacity.
Confirm that the chassis provides the required output voltage and enough continuous and peak current. Check whether the arm needs a separate power supply, a DC-DC converter, or electrical isolation.
Estimate battery runtime across the real duty cycle: travel, waiting, arm movement, gripper use, and sensors. If you add a battery or power module, include its weight in the mounted load and check its mounting position and cooling requirements.
Do not estimate runtime from amp-hours (Ah) alone. Voltage, power draw, duty cycle, usable battery capacity, and temperature all affect operating time. Ask for an estimate based on your task cycle and confirm it through integrated system testing.
5.2 Verify ROS 2, API, and Communication Compatibility
If your project uses ROS 2 (Robot Operating System 2), confirm that the AMR chassis and robotic arm have compatible drivers, documentation, and communication methods. Depending on the product, options may include ROS 2 packages, SDKs, APIs, Ethernet, or CAN.
However, ROS 2 support does not mean plug-and-play integration. The integration team must also check the ROS 2 distribution, driver versions, topics, services, actions, coordinate frames, time synchronization, motion commands, and fault feedback.
The chassis and arm must use a consistent coordinate system. The navigation system also needs an accurate representation of the space occupied by the arm and mounted equipment.
Before purchase, request interface specifications, SDK/API documentation, ROS 2 driver details, communication protocols, sample code, and information about technical support for secondary development.
5.3 Plan Safety Functions and Coordinated Control
Adding a robotic arm changes the robot’s operating envelope. The arm may extend beyond the chassis, enter pedestrian areas, or block safety sensors. Assess the chassis, arm, tool, surrounding equipment, and people as one system.
Confirm how an emergency stop affects both the AMR and the arm, and what safe state each system enters. Define the conditions for travel, arm operation, and maintenance modes.
Decide whether the arm must return to its transport position before the chassis can move, and whether chassis movement is blocked while the arm is working. Make sure safety scanners and obstacle-detection sensors still provide suitable coverage after integration.
For driverless industrial trucks and their systems, ISO 3691-4:2023 provides relevant safety requirements and verification guidance. Whether it applies to your project depends on the equipment, local regulations, and risk assessment. An AMR chassis with emergency-stop and obstacle-avoidance functions does not automatically make the complete mobile manipulator safe.
Step 6: Standard vs. Custom AMR Chassis: Which Should You Choose?
By this point, you should have a clear set of requirements. Use it to decide whether a standard mobile robot platform will work or whether customization is necessary. Neither option is always better. The right choice depends on the project’s real constraints.
6.1 When Is a Standard AMR Chassis the Better Choice?
A standard chassis is often the simpler option when its payload rating, center-of-gravity limits, dimensions, mounting interface, drive system, navigation, power, and software interfaces meet your needs. It may reduce design effort and simplify maintenance, spare parts, and repeat production.
Still, the published specifications must apply to the actual mounted equipment. A 100 kg maximum payload rating does not, by itself, confirm compatibility with a particular robotic arm. Check the load position, working posture, travel speed, and test conditions. You can compare examples in Fdata’s mobile robot chassis lineup.
6.2 When Do You Need a Custom AMR Chassis?
Consider a custom AMR chassis when standard models cannot meet essential project requirements.
Customization may be needed for unusual arm mounting dimensions or bolt patterns, a reinforced top plate, or an adapter bracket. It may also be necessary when the total load, center of gravity, or load distribution exceeds the limits of a standard chassis.
Other reasons include narrow aisles, low equipment clearance, special turning or floor conditions, and project-specific power, sensor, communication, or software interfaces. OEM/ODM projects may also require a dedicated enclosure, dimensions, branding, or production configuration.
Customization also adds design, validation, lead time, and maintenance costs. First identify the gaps in the standard product. Then ask the supplier to define the required changes, cost, schedule, testing, and spare-parts plan.
6.3 What Should You Send the Supplier for a Quote?
A useful quotation starts with accurate application data. Prepare the following:
- Robotic arm brand and model, arm weight, rated payload, and maximum reach.
- End effector weight, maximum workpiece weight, and most demanding arm positions.
- Arm mounting drawings, bolt pattern, planned mounting height, and mounting location.
- Weights of other onboard equipment, such as controllers, computers, sensors, and extra batteries.
- Site photos or layout drawings, aisle widths, slopes, thresholds, and floor type.
- Operating sequence, including whether the arm retracts during travel and whether precise docking is required.
- Software and interface needs, such as ROS 2 version, SDK/API, Ethernet, CAN, and emergency-stop connections.
If some information is not yet available, start with the arm model and application. Ask the supplier what else is needed. Do not leave out the maximum workpiece weight or extended arm positions just to get a faster quote.
Step 7: Test the AMR Chassis Before Purchase
Datasheets and CAD drawings help narrow down your choices, but they cannot replace testing. Where possible, validate the actual arm, mounting structure, and loads under conditions close to the real application.
7.1 Review Specifications and Mechanical Drawings
Review how the supplier defines rated and maximum payload, the related test conditions, and the permitted load center. Compare arm and chassis mounting drawings for installation space, bolt holes, and cable routing.
Also check supply voltage, continuous and peak current, software drivers, communication protocols, and safety interfaces. Compare the assembled robot’s dimensions with actual aisles, slopes, thresholds, workstations, and maintenance space.
7.2 Test Mounting Strength, Payload, and Stability
With the arm installed, test the retracted position, full reach, side reach, and maximum workpiece load in a controlled environment after completing a suitable risk assessment. Watch for unusual vibration, structural deflection, wheel unloading, tilting, or other signs of instability.
Also check the fully loaded chassis during starting, braking, turning, and travel along approved routes. The project team and supplier should agree on test speeds, slopes, and loads. Do not attempt uncontrolled limit tests.
7.3 Test Navigation, Docking, and Arm Coordination
Run the robot along the planned route several times. Record its stopping position, orientation, and repeat docking performance. Then have the arm complete typical tasks at those stopping positions to see whether vision guidance, fixtures, or additional calibration are required.
Test the full control sequence as well: when the chassis can move, when the arm can extend, and how both systems respond to communication loss or emergency stops. Testing each machine separately is not enough.
7.4 Test Battery Runtime and Continuous Operation
Run a representative full work cycle and record power consumption and temperature during travel, waiting, picking, standby, and charging. Runtime depends on load, speed, route, arm activity, ambient temperature, and battery condition. Use the complete system’s measured performance as the final reference.
Define Purchase Acceptance Criteria
Define the test items, loads, routes, docking requirements, continuous operating time, fault responses, and pass/fail criteria in the project plan or purchase agreement. Depending on the project, arrange a factory acceptance test (FAT) and a site acceptance test (SAT). A single demonstration should not be the only basis for acceptance.
Fdata AMR Chassis Options: Standard Platforms and Custom Integration
If you are looking for an AMR chassis for robotic arm integration, start by comparing standard platforms against your payload, mounting dimensions, operating environment, and interface requirements. Then decide whether a customized configuration is necessary.
Fdata supplies mobile robot chassis and OEM/ODM solutions. Its A012 series uses a four-wheel-drive, four-wheel-steering (4WD-4WS) configuration and can serve as a starting point for mobile manipulation, inspection, and other robot integration projects.
Here is a quick comparison of the A012 and A012 Plus:
| Plataforma | Key Specifications | Potential Fit |
|---|---|---|
| Fdata A012 mobile robot platform | 4WD-4WS; approx. 620 × 520 × 340 mm; 44 kg chassis weight; 60 kg maximum payload; 8 km/h maximum speed; ROS1/ROS2 listed. | A compact starting point for lighter mounted equipment, subject to checks on total load, center of gravity, mounting, and working conditions. |
| Fdata A012 Plus platform | 4WD-4WS; approx. 920 × 700 × 420 mm; 80 kg chassis weight; 100 kg maximum payload; 8 km/h maximum speed; ROS1/ROS2 listed. | A starting point for projects that need a higher payload class. Mounting interfaces, load structures, and sensor configurations can be assessed for customization. |
Specification note: These figures are based on Fdata’s published model specification tables and are intended for initial comparison only. A maximum payload rating is not a guarantee for every mounting position, center-of-gravity height, speed, or terrain condition. Request the latest datasheet for the exact configuration and have the completed system reviewed.
Beyond standard platforms, Fdata offers custom mobile robot and OEM/ODM solutions. Depending on project requirements, this can include changes to load structures, mounting interfaces, sensor layouts, and software integration. Fdata also describes API support for secondary development on the A012 Plus product page.
Contact Fdata for AMR Chassis Selection Advice
To help the Fdata team evaluate your project, provide the key information below.
Share the arm brand and model, its weight, reach, and rated payload. Include the gripper and heaviest workpiece, plus typical working positions and any mounting drawings or CAD files.
Also provide the required chassis size, site and floor conditions, slope and aisle details, power needs, ROS 2 or other communication requirements, and safety interfaces.
Not sure which AMR chassis is right for your robotic arm project?
Contact the Fdata technical team for advice on chassis selection and custom integration.
Conclusión
Choosing an AMR chassis for robotic arm integration takes more than checking maximum payload. Review the arm specifications, application requirements, stability, mounting design, navigation, and system compatibility. Then validate the proposed setup through practical testing.
The best AMR chassis is not simply the one with the highest specification on paper. It is the one that allows the arm, chassis, mounted equipment, and control system to work reliably in the intended environment. Clear project requirements and early discussions with suppliers can reduce selection mistakes, rework, and integration costs.
Preguntas frecuentes
What payload capacity does an AMR chassis need for a robotic arm?
The required AMR chassis payload capacity depends on the total weight of the robotic arm, mounting brackets, end effector, maximum workpiece, and onboard equipment. The chassis must also support the expected load distribution and dynamic forces. Always verify the allowable center of gravity and operating conditions before selecting a payload rating.
Can a standard AMR chassis be used for robotic arm integration?
Yes, a standard AMR chassis can support robotic arm integration if its load capacity, mounting structure, power supply, and control interfaces meet the arm’s requirements. Some applications may need additional mounting brackets or reinforced platforms. If standard configurations are insufficient, a customized AMR chassis may be necessary.
Can industrial robotic arms and collaborative robots use the same AMR chassis?
Yes, industrial robotic arms and collaborative robots (cobots) can use the same AMR chassis model if their individual requirements are met. Compatibility depends on arm weight, reach, mounting dimensions, power requirements, and operating forces. Each combination requires separate stability and safety assessments.
Does a longer robotic arm reach require a larger AMR chassis?
Not necessarily. A longer robotic arm reach can increase the tipping moment, but it does not automatically require a larger AMR chassis. The required chassis size depends on the arm’s weight, mounting height, center of gravity, load distribution, and platform geometry. A stability assessment is essential before making the final selection.
Does an AMR-mounted robotic arm need additional stabilizers?
Not every AMR-mounted robotic arm needs additional stabilizers. A properly designed mobile base may provide sufficient stability during stationary operation. However, heavy payloads, extended arm positions, or precision tasks may require stabilizing feet, mechanical locks, or other support systems to improve stability and positioning performance.
Can one AMR chassis support robotic arms from different manufacturers?
Yes, a modular AMR chassis may support robotic arms from different manufacturers if their mechanical, electrical, and software requirements are compatible. Key factors include mounting dimensions, payload limits, power supply, and communication interfaces. For future upgrades, choose a chassis with flexible mounting options and accessible development interfaces.
